

Door crew guide
Accept a crew invitation, open the scanner, save the guest list, scan visitors and handle saved, declined and offline scans.
Who this is for: people who check guests in at an entrance or a room. Crew can scan. They have no access to Partner Studio.
Where to sign in: xperience.my/work on the web, or the Xperience native app. Use the same account the invitation was sent to.
Related guides: Running the door, Native app and AI Horizon entrance.
Accept your invitation
- Sign in at xperience.my with the email the invitation was sent to, and open Work.
- If your email is verified, Work accepts the invitation for you. It shows "Adding you to the invitations sent to your email…", then a confirmation, and the assignment appears under Event work.
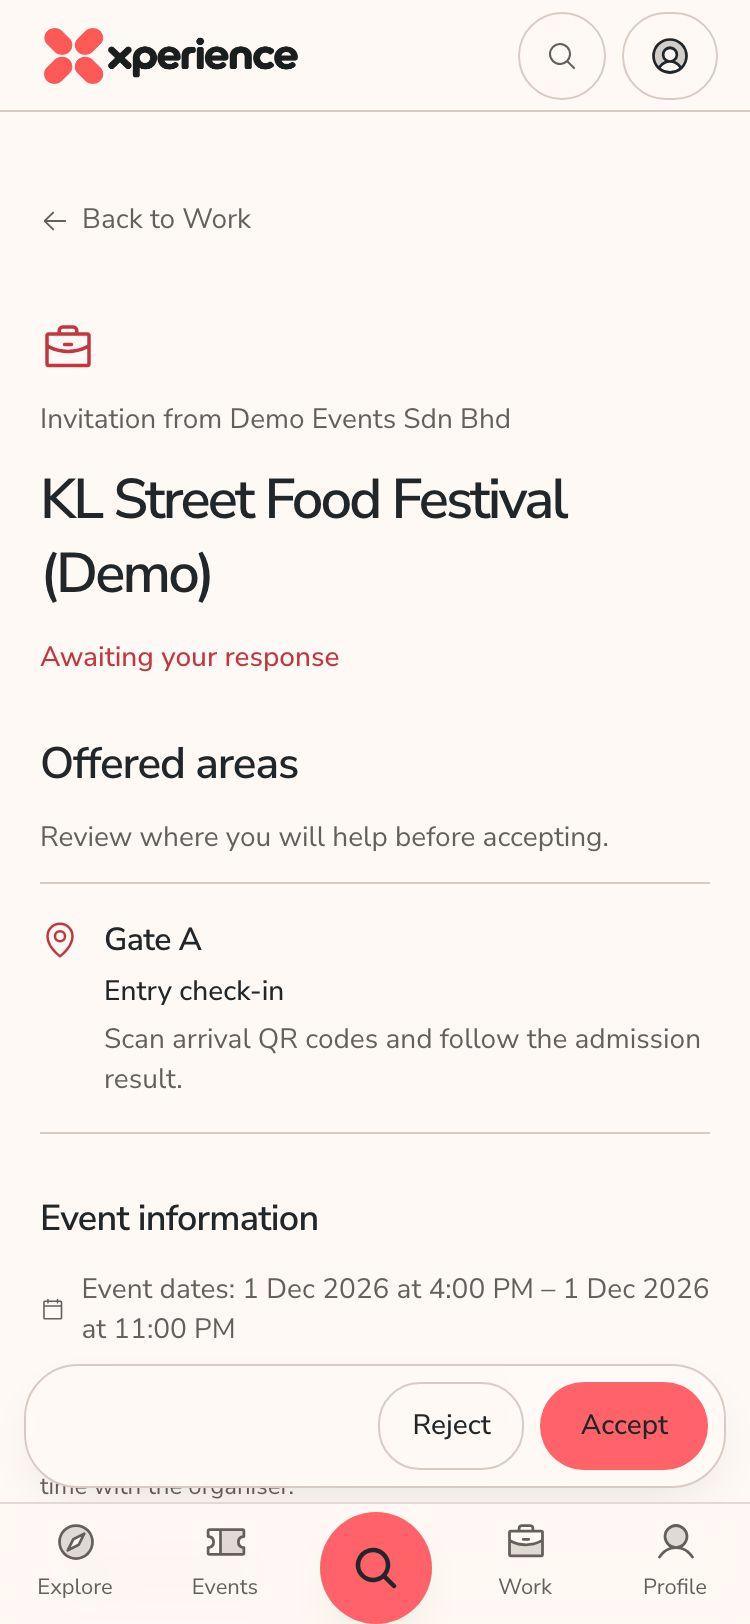
- If it could not add you, the invitation stays listed. Choose it, check the event and the areas you will cover, then choose Accept.
- The link in the organiser's email opens the invitation directly. It shows Awaiting your response, with Accept and Reject. Choose Reject if it is not for you.
- Have a crew join code instead? On Work, under Have a crew join code?, paste it into Paste join code and choose Redeem.
An invitation is tied to the email it was sent to. Sign in with that exact address.
Reach the scanner
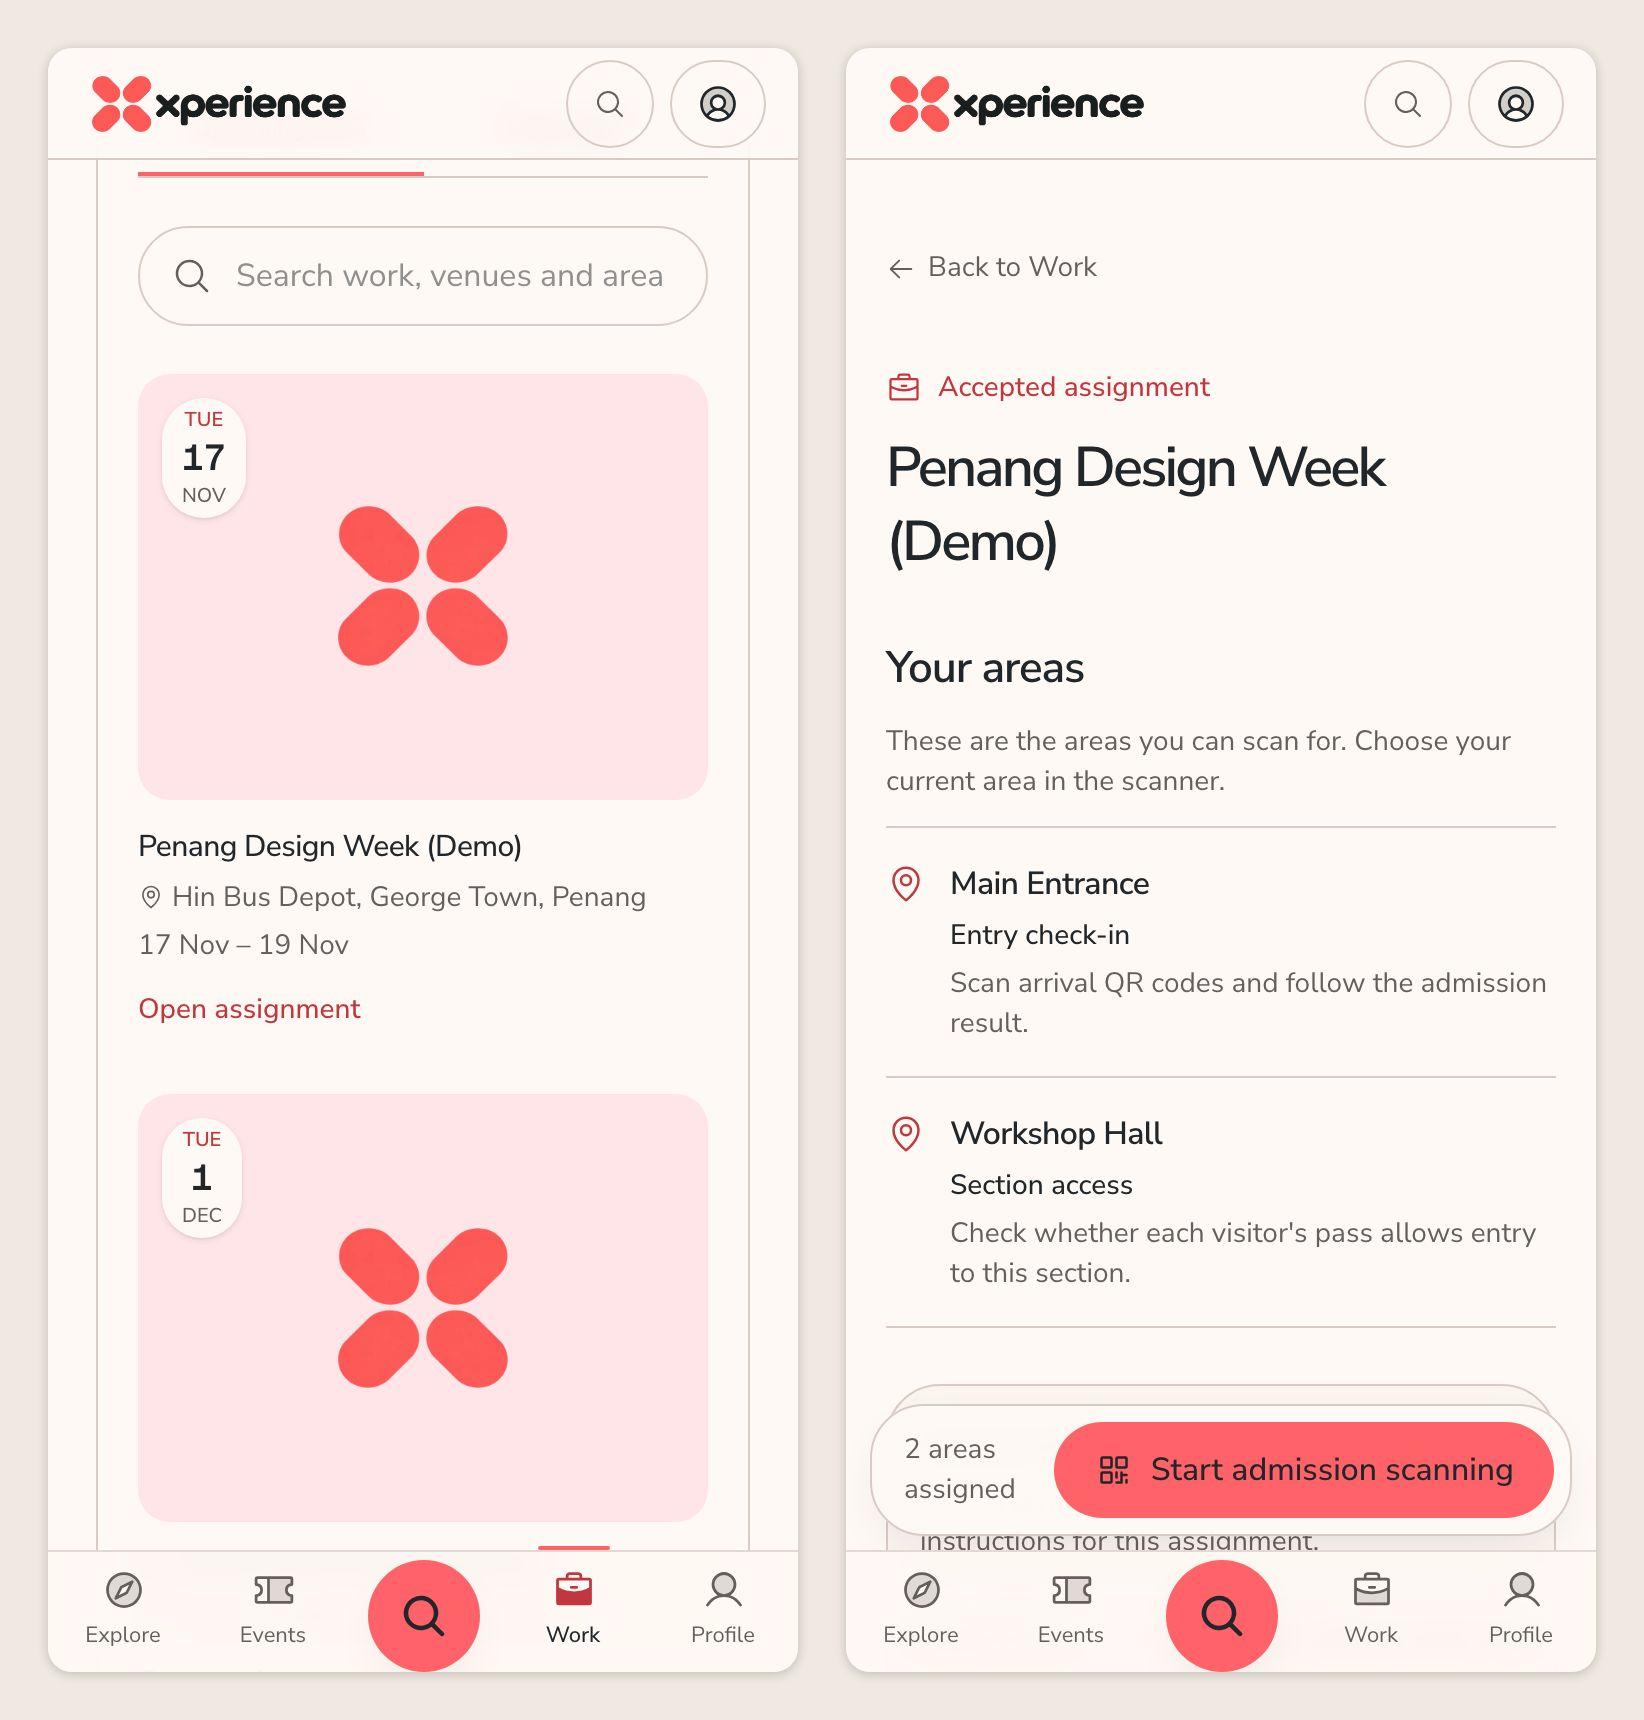
- Open Work. Under Event work, choose Upcoming work.
- Open your event. The assignment shows Your areas and your Crew briefing with report time and instructions.
- Choose Start admission scanning.
- If you have more than one zone, pick yours under Scanning at (Choose your zone). With one zone it is chosen for you. No zone? Ask the organiser to assign you one.
This scanner checks the live server each time, so it needs a connection. It reads You are offline. Reconnect before checking a visitor. when the signal drops.
Scan with a connection
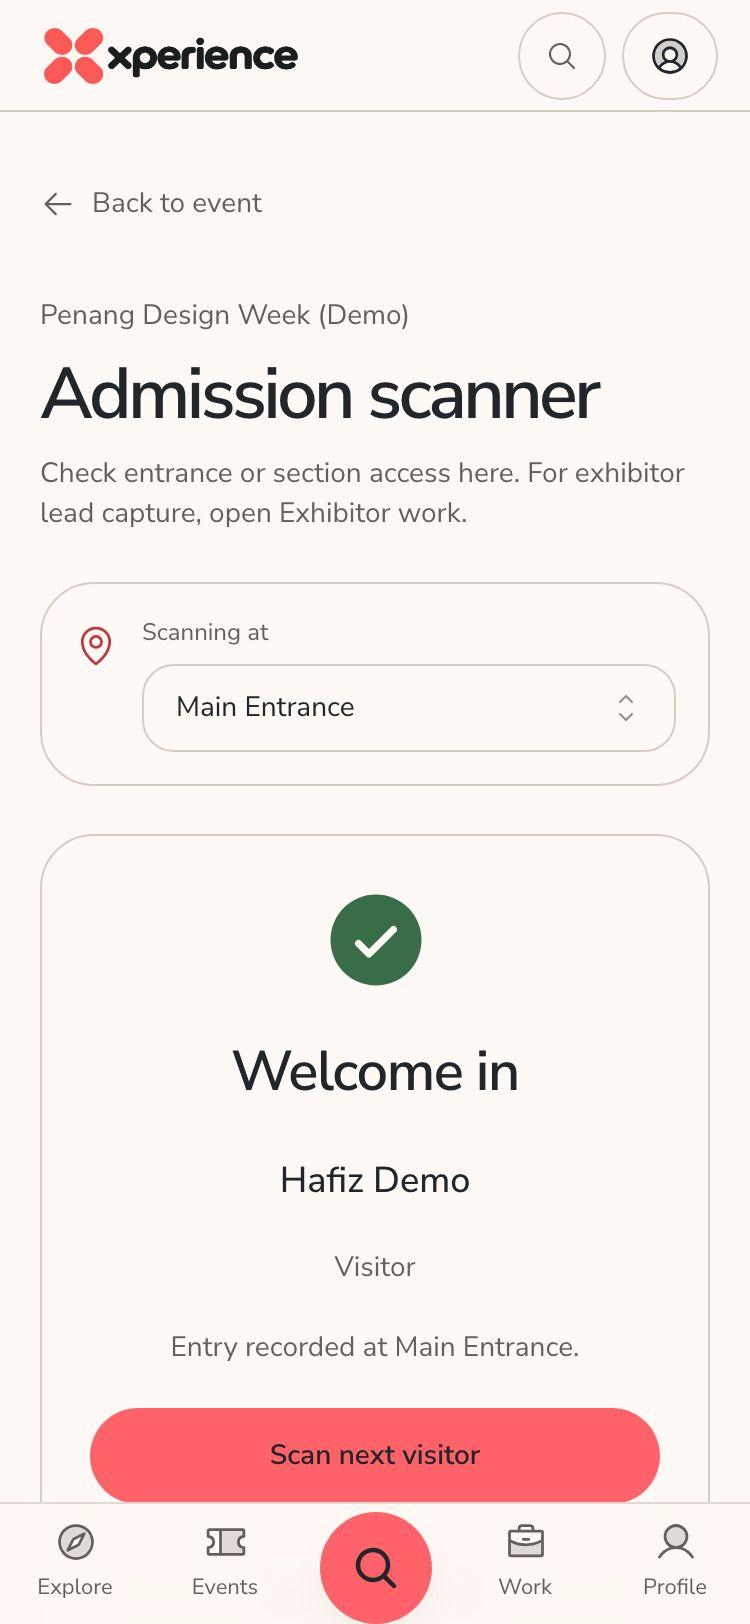
- On Admission scanner, hold the visitor's QR inside the frame. The scanner reads it by itself. If the camera cannot start, allow camera access in the browser settings and close other apps that use the camera.
- Read the result.
- Welcome in: entry is recorded.
- Already recorded: this visitor was already counted here today. No extra visit was added.
- Not admitted: the pass does not allow entry here. Ask the organiser.
- Choose Scan next visitor for the next person, or Back to scanner.
Scan without a connection
Use this when the venue has weak signal. The organiser gives you an offline door device link, created under Zones & Staff → Offline door device access. Open the link on the phone you will use at the door. Once you have opened it, the phone keeps it under Door scanners on the saved offline page.
Save the guest list first.
- Open the scanner link while you are online.
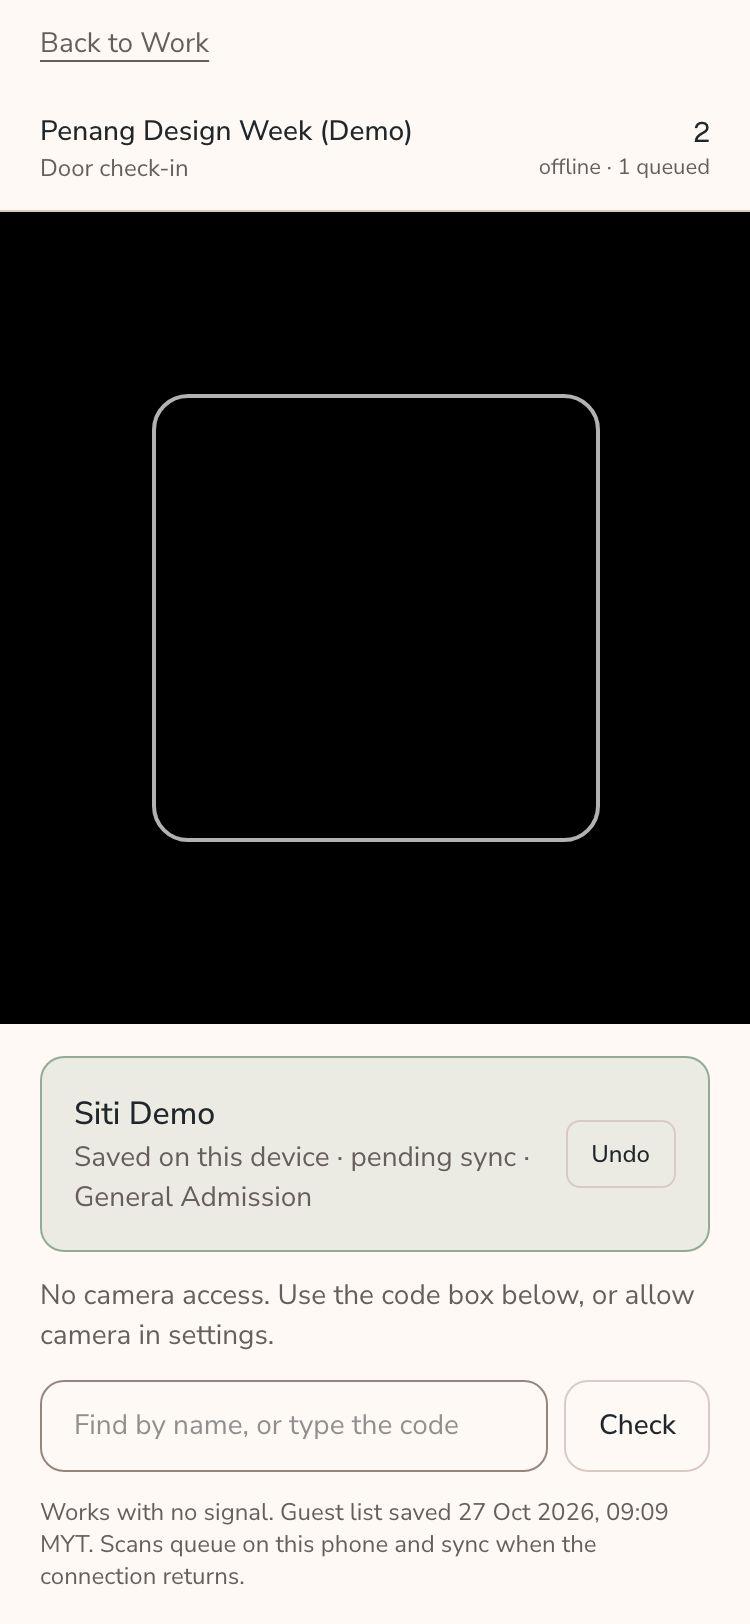
- Wait until the foot of the screen reads "Guest list saved" with a time. Scanning offline uses this list. Later ticket changes cannot reach the phone until you are online again.
- Use the same phone and browser for the whole event.
Scan.
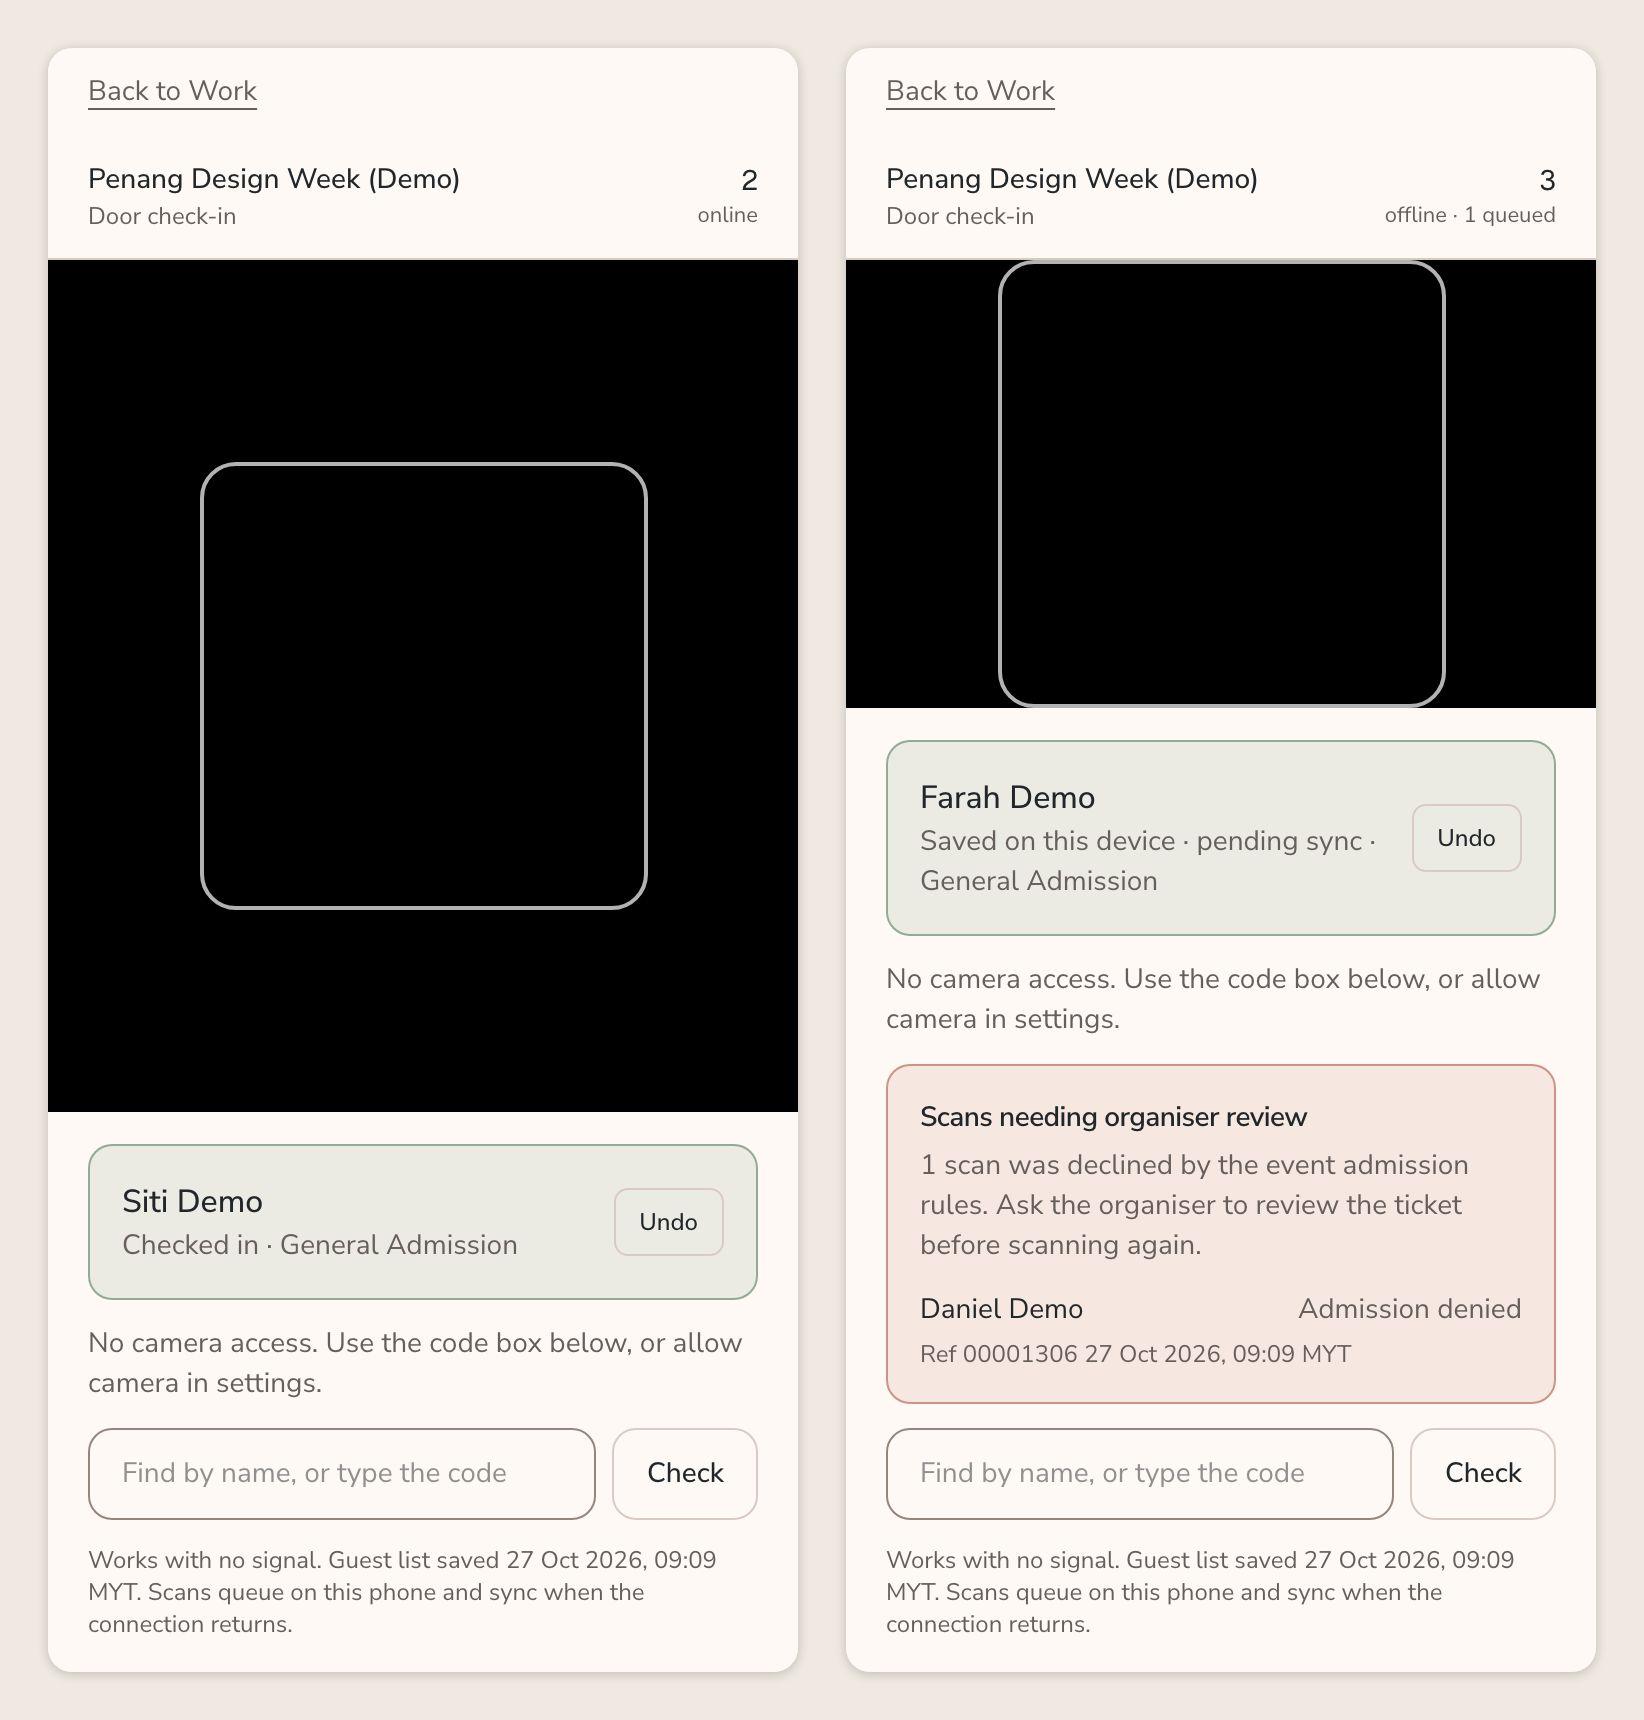
- Hold the visitor's QR in the frame, or type their name or code into Find by name, or type the code and choose Check. Tapping a name in the list also checks them in.
- The top of the screen shows Door check-in, online or offline, and how many scans are queued.
- If you scan the wrong person, choose Undo on the result.
What the messages mean
| You see | It means | What to do |
|---|---|---|
| Saved on this device · pending sync | The scan is on this phone. The server has not confirmed it yet. | Keep the phone's data. It syncs when the connection returns. |
| Checked in | The server accepted the scan. | Nothing. |
| Already checked in today | This ticket was already scanned today. | Nothing. |
| Not on the list for this event | The ticket is not on the saved guest list. | Check the event, or ask the organiser. |
| Not a valid ticket code | The code is not a genuine Xperience ticket. | Ask for the ticket QR. |
| Admission denied by the event rules. Ask the organiser to review this ticket. | The server declined the scan. | Send the guest to the organiser. |
| Scans needing organiser review | A list of scans the server declined, each marked Admission denied or Invalid code, with a reference. | Ask the organiser to resolve each ticket before you scan it again. |
| Taken back on this phone only. | You undid a scan that had already synced. The server still has the guest checked in. | Tell the organiser to clear it. |
A declined scan no longer blocks the rest of the queue. Declined scans stay on the list after a reload. They are not successful check-ins.
Retry and fix problems
- A red panel under the result says why a sync did not finish. Your saved scans stay on the phone.
- Choose Retry sync once you have a stable connection.
- "Sign in again to sync scans" means your sign-in expired. Sign in with the account the organiser assigned and the sync continues.
- "Scanner access is unavailable. Contact the organiser." means your access was revoked or the link is no longer valid. Ask the organiser.
- "Scan not saved. Free device storage" means the phone is full. Free space, then scan that ticket again.
Never clear device data with unsynced scans
Scans waiting on the phone exist only on that phone. Do not clear the browser's site data, use a private window, or switch browsers or phones while any scan shows Saved on this device or a queue count above zero. Revoking device access later stops syncing, but cannot remove data already saved offline.
Deleting your account has a guard for this. If unsynced scans are found, the button changes to Delete account and preserve device scans and keeps them on the device.
Scan in the native app
The native app scans online only. There is no offline queue.
- Open the app and sign in. Open Work, then your assignment.
- Under Scanning location, choose where you are working.
- Choose Open camera and allow camera access when asked.
- Scan the visitor's ticket. The app shows Checking visitor…, then the result. Choose Scan next visitor to continue.
If the phone is offline the native scanner cannot admit anyone. For a weak-signal venue, use the web scanner link with a saved guest list.
Organiser guide
Create a workspace and an event, sell tickets, invite your team, make codes and read results in Partner Studio, with what owners, admins and staff can each do.
Exhibitor guide
Accept a company invitation, set up your company profile and crew, scan visitor leads, complete the survey and export your leads.