

Organiser guide
Create a workspace and an event, sell tickets, invite your team, make codes and read results in Partner Studio, with what owners, admins and staff can each do.
Who this is for: people who run events. In an organiser workspace you are an owner, an admin or staff. Door crew belong to the same role list, but they have no Studio access. See the door crew guide.
Where to sign in: Partner Studio at partner.xperience.my. Sign in with the same email code you use on xperience.my.
For the full event set-up order, see Setting up an event. This page shows each task as steps and says who may do it.
Create your workspace
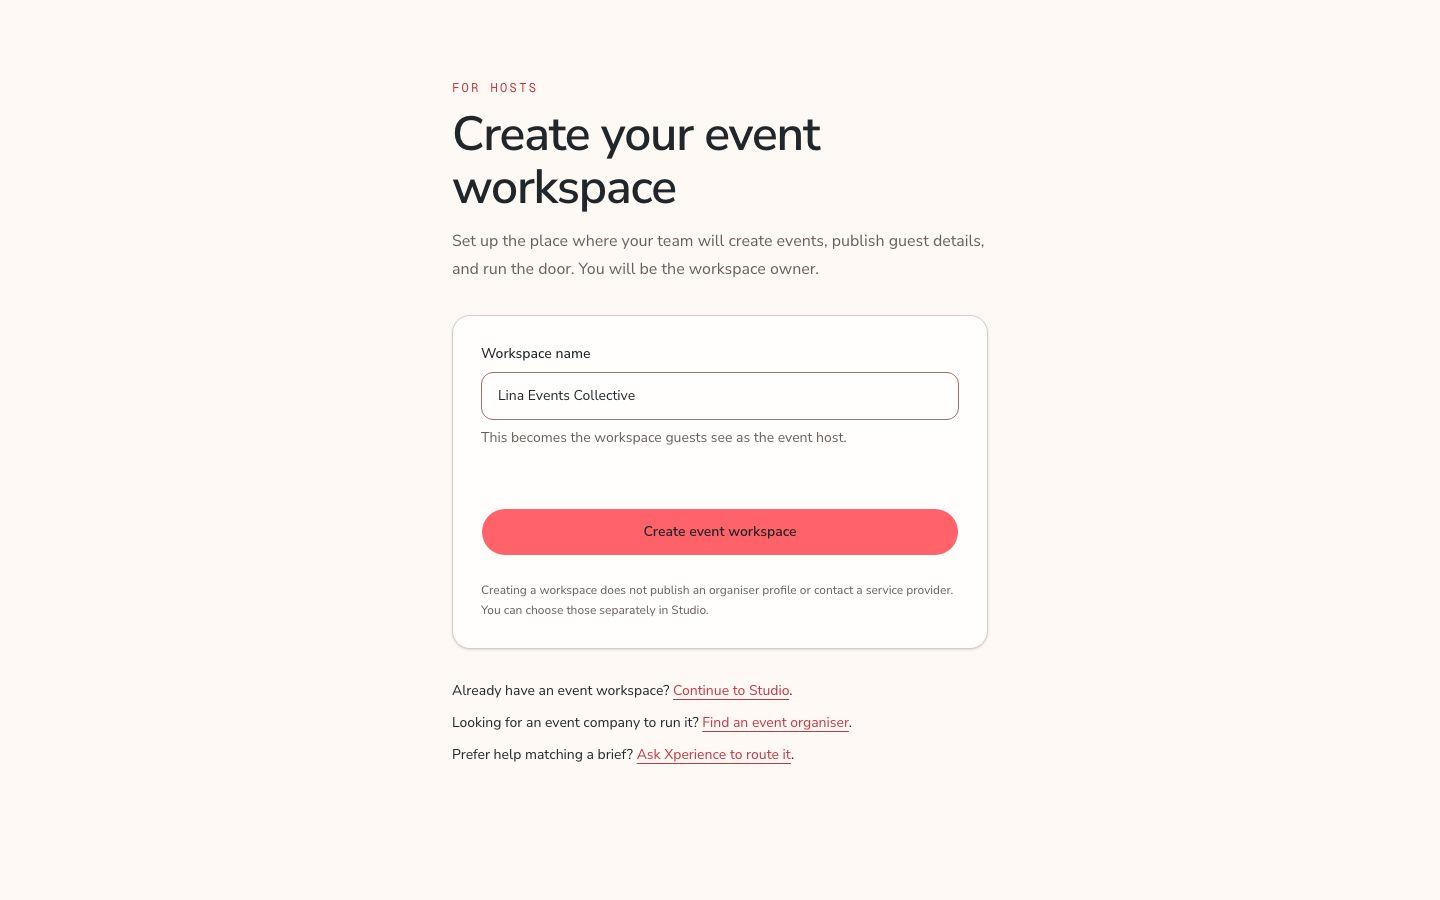
You need a workspace before you can create events. You become its owner.
- Sign in at xperience.my and open Work.
- Choose Create your event workspace. You land on the same heading on the partner host.
- Enter Workspace name. Guests see it as the event host.
- Choose Create event workspace.
- Already have a workspace? On Work, choose Open Studio instead.
Create an event
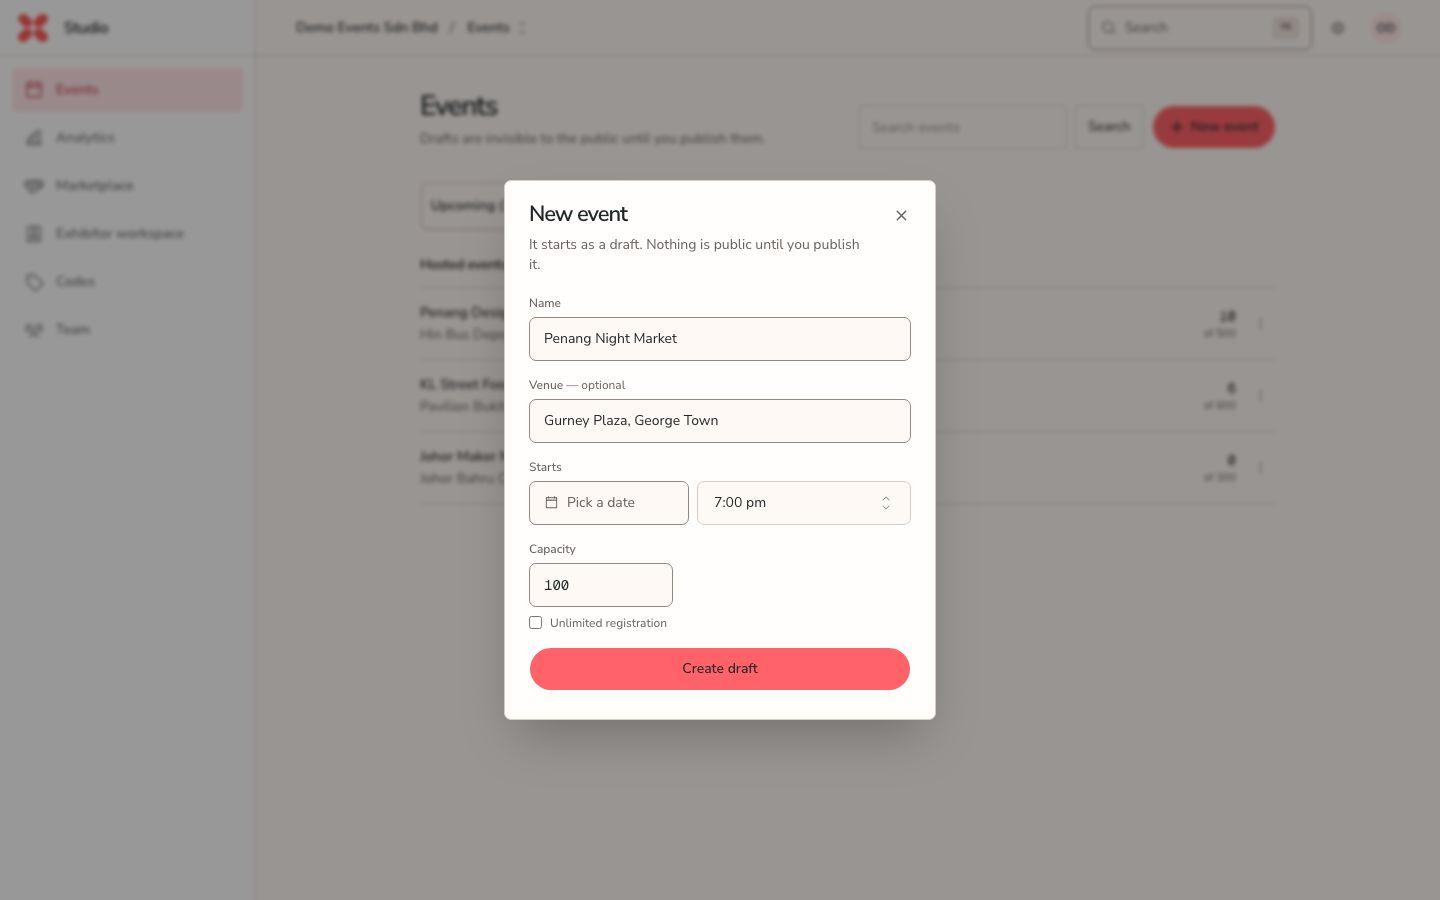
- In Studio, open Events.
- Choose New event.
- Enter Name. Venue, Starts and Capacity are optional. Capacity starts at 100. Tick Unlimited registration to remove the cap.
- Choose Create draft. Nothing is public until you publish.
- Find an event again with Search events. The list is split into Upcoming and Past.
Add tickets
- Open the event, then Tickets & Forms.
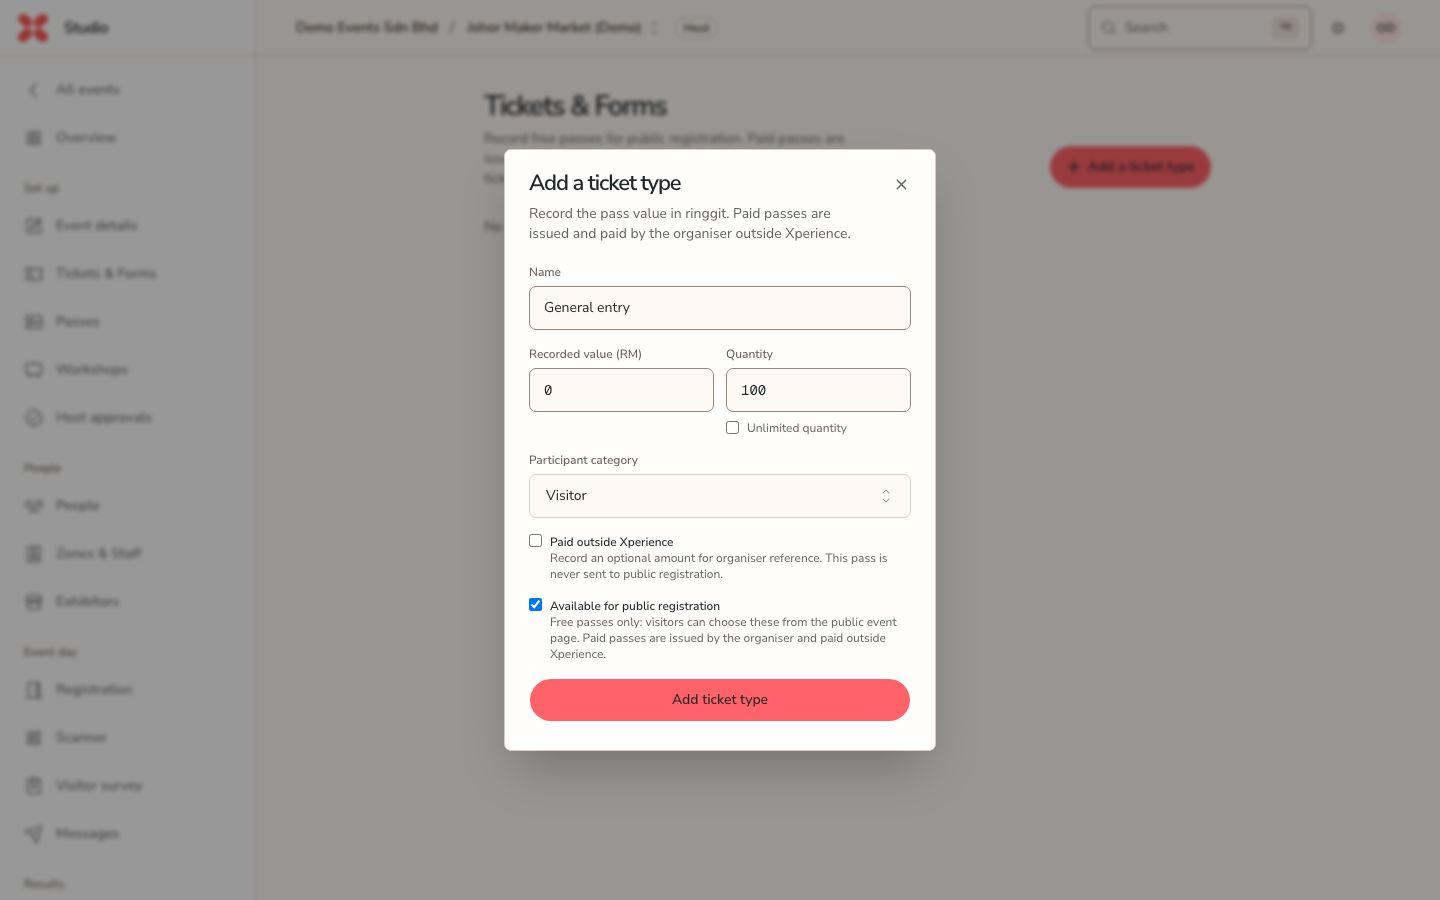
- Choose Add a ticket type.
- Fill in Name, Recorded value (RM) and Quantity. Tick Unlimited quantity to remove the cap. Choose a Participant category: Visitor, Staff or Exhibitor. A free pass has a value of RM 0.
- Leave Available for public registration ticked for a free pass that visitors can pick on the public event page. The form says paid passes are issued by the organiser and paid outside Xperience.
- Tick Paid outside Xperience for a pass the organiser collects payment for elsewhere. You can record an optional amount for your own reference. That pass is never sent to public registration. Then choose Add ticket type.
- Choose a ticket name to set its zones and registration form under Passes. Choose Publish form when the form is ready.
A ticket type that has sold shows locked. Its price cannot be changed.
Set the schedule
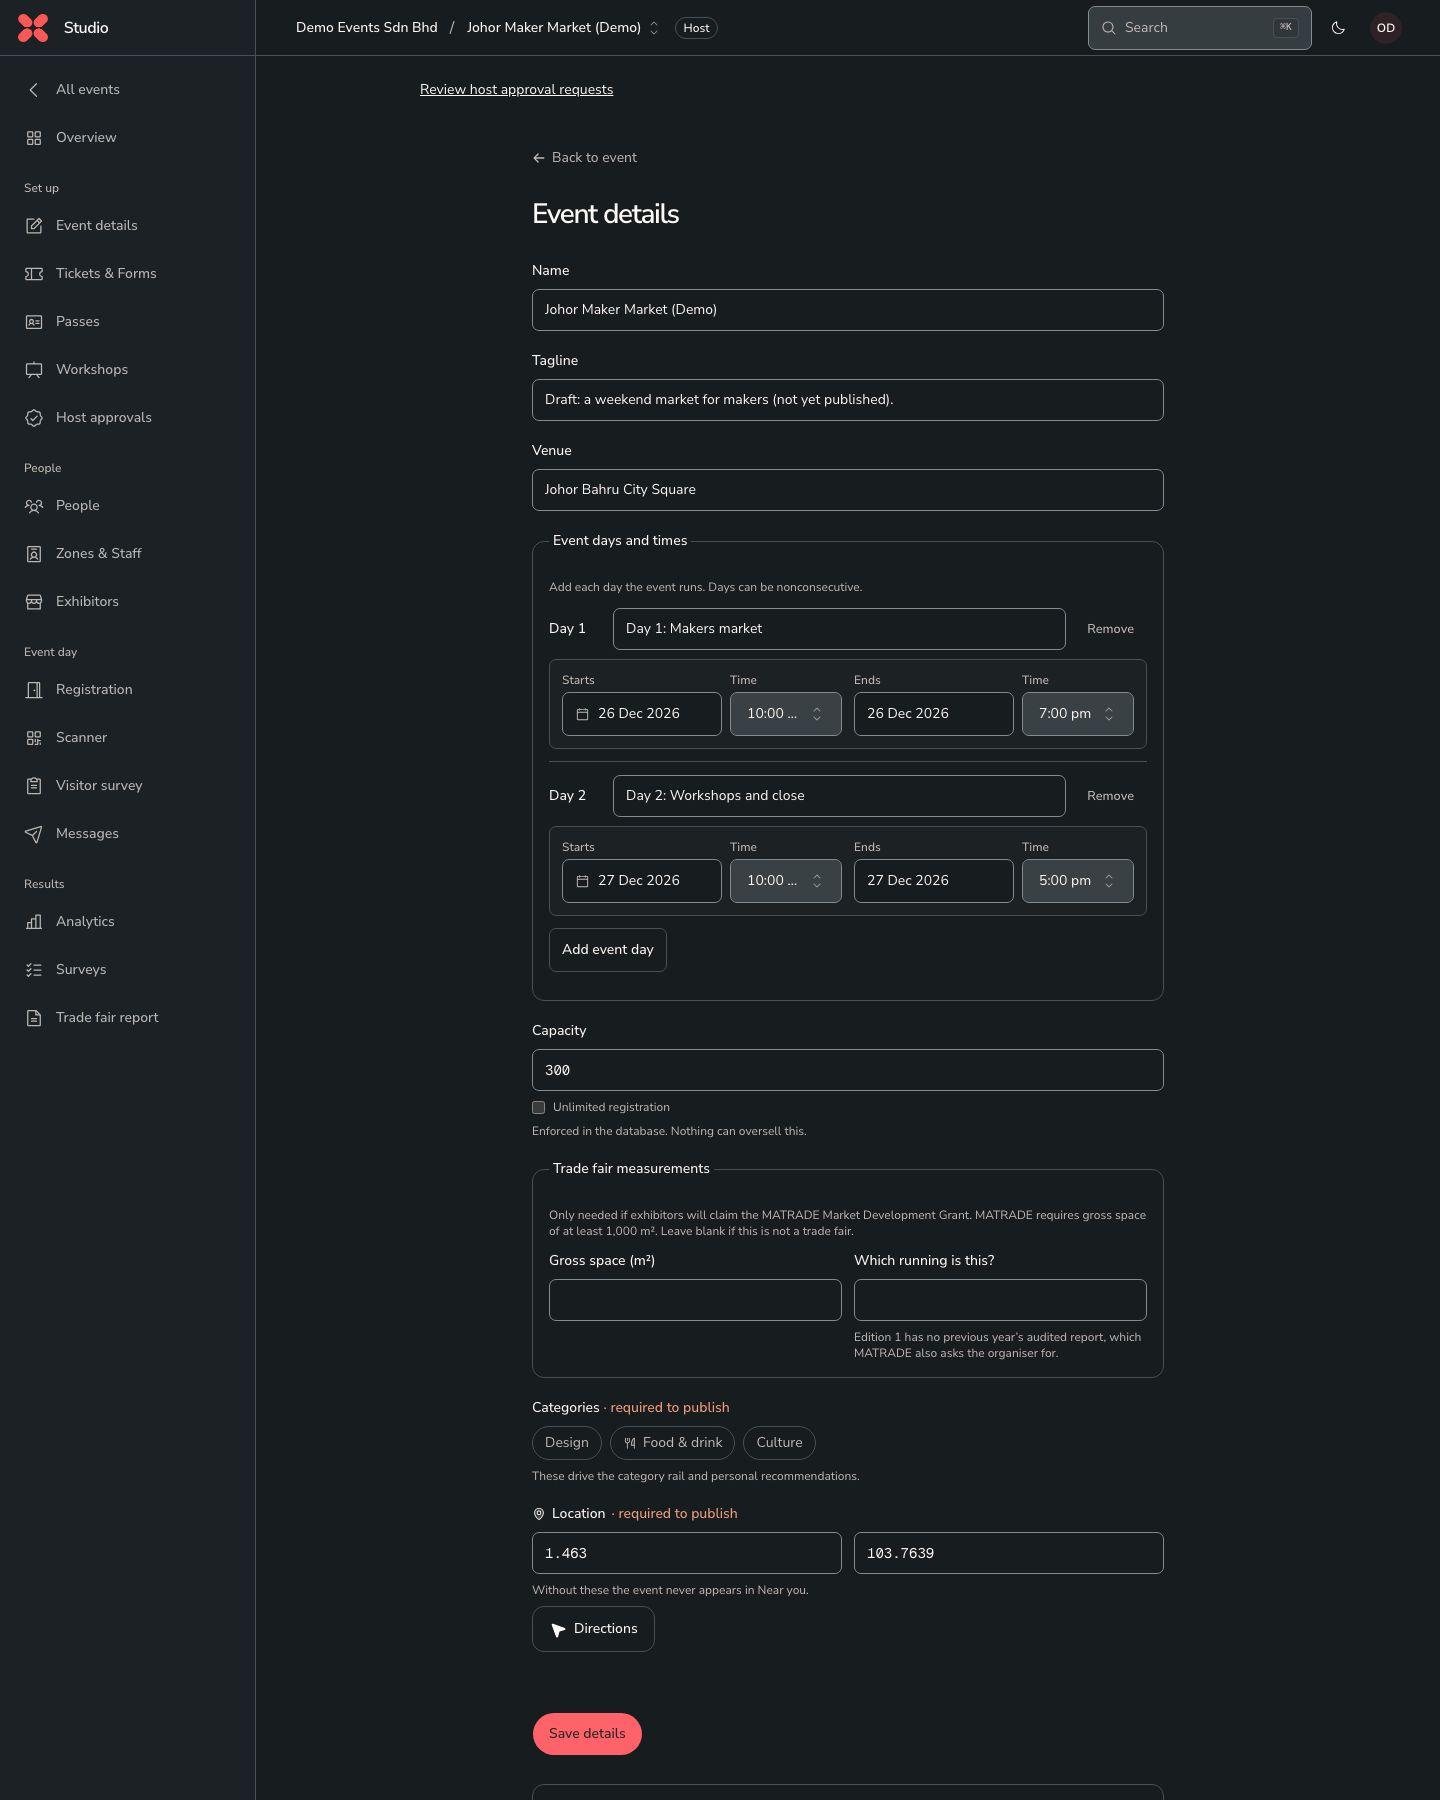
- Open Event details.
- Set the name, venue and Event days and times. Each day has its own row.
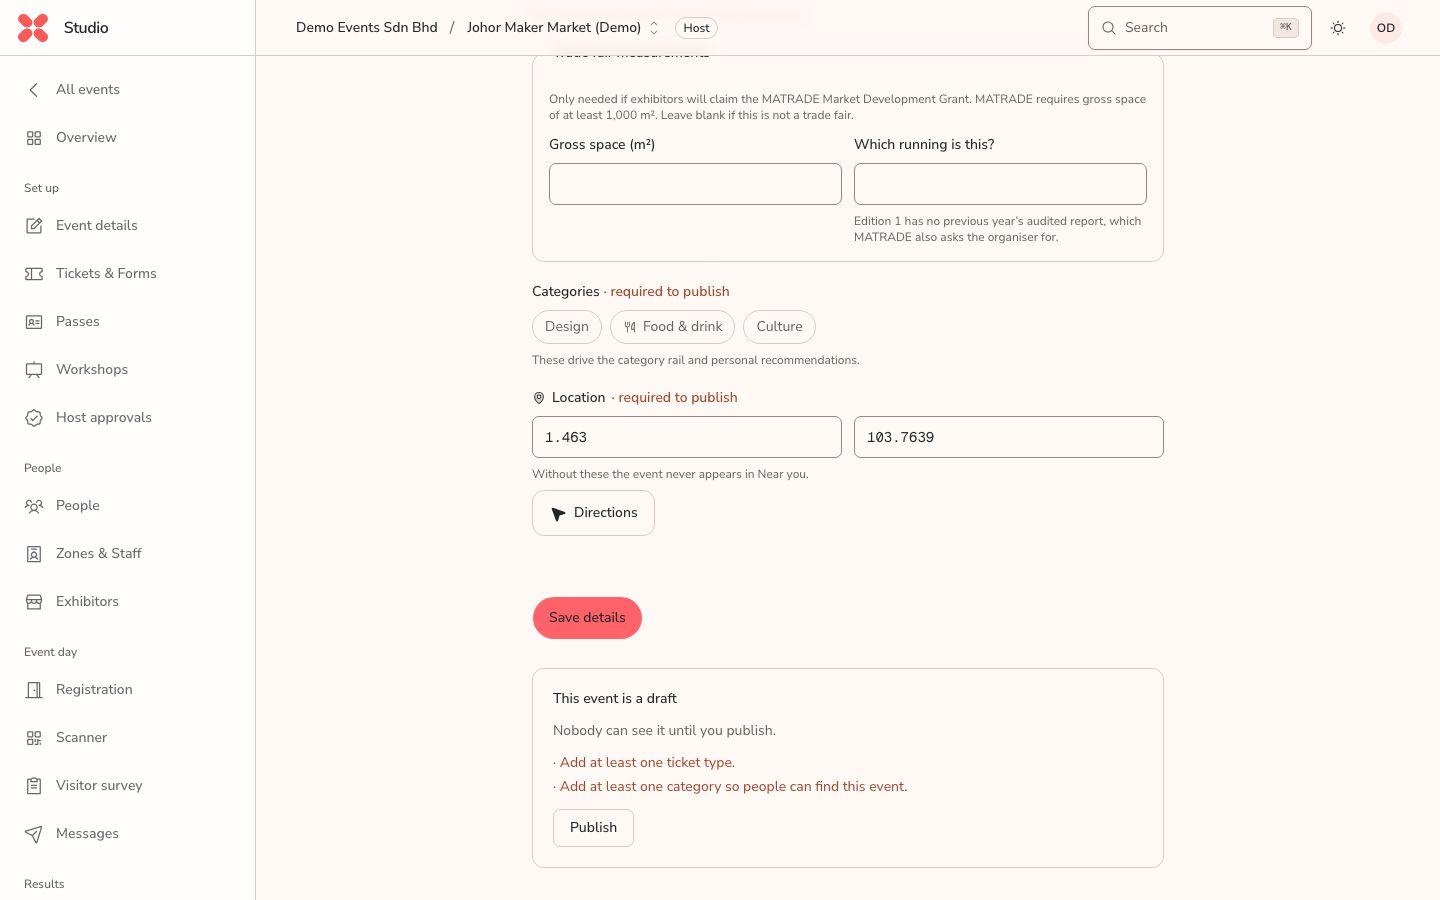
- Set the capacity, categories and location. Categories and location are required before you can publish.
- Choose Save details.
- For breakout rooms, open Workshops and choose Add a workshop. A workshop lands as a draft with its own seats and tickets. See Workshops and breakout rooms.
Publish
Only owners and admins can publish.
- Open Event details and scroll to the status panel. It reads This event is a draft.
- Choose Publish. If something is missing, the panel lists it under the button.
- A live event reads This event is live. Unpublish hides it from browse at once. Existing tickets stay valid.
Use the Event readiness list on the event Overview to check the setup first.
Invite your team
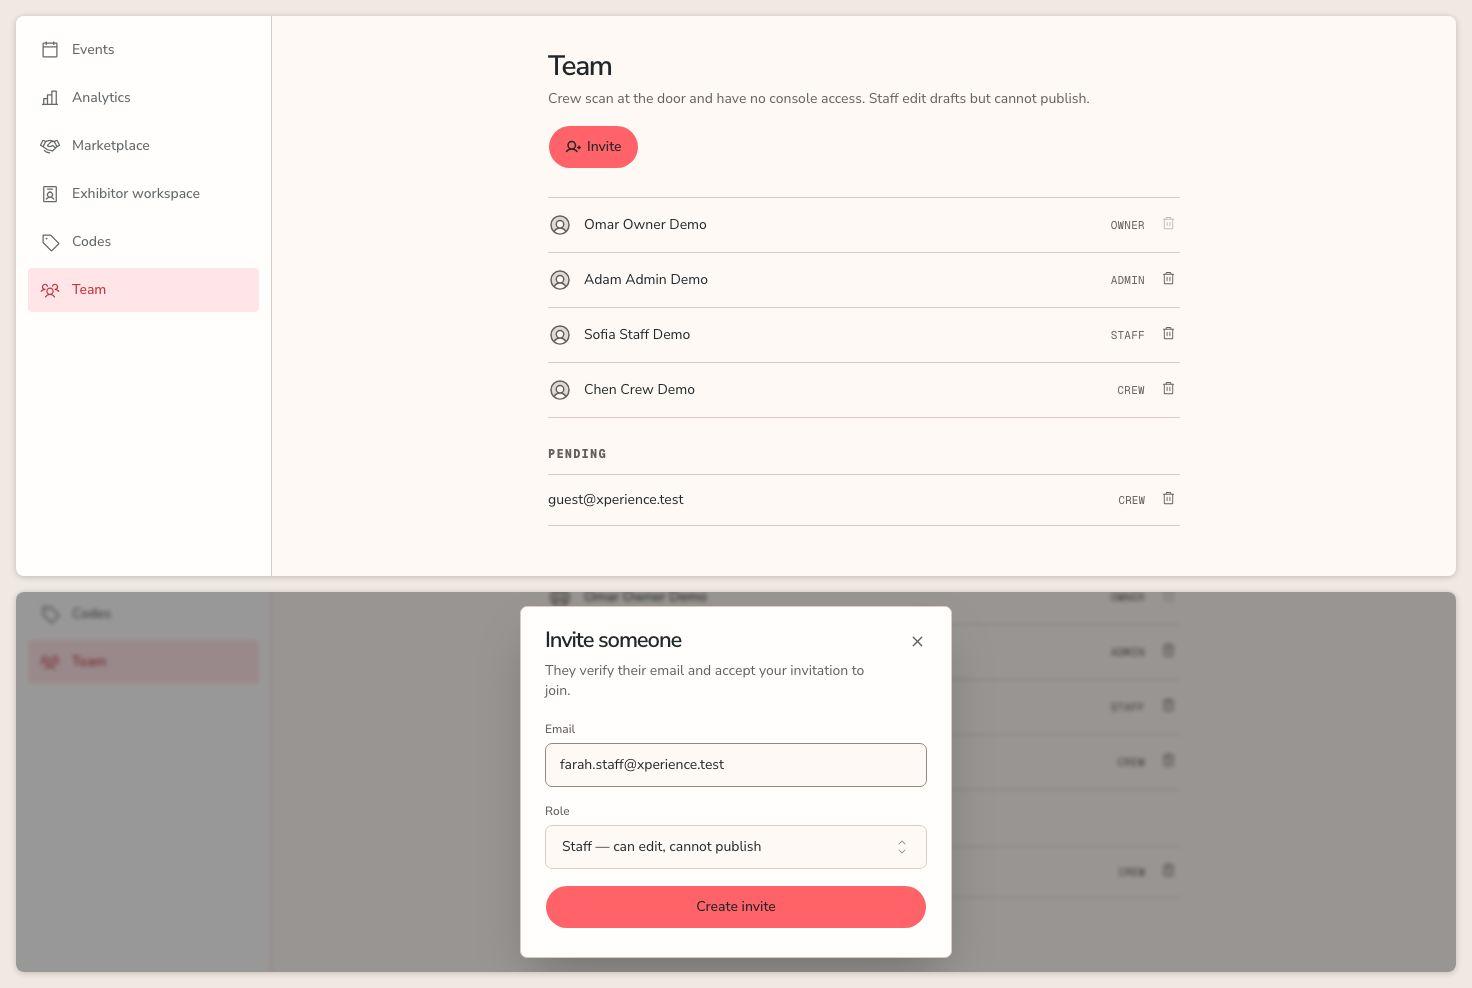
- In Studio, open Team.
- Choose Invite. The Invite someone dialog opens.
- Enter the Email and pick a Role.
- Choose Create invite. The dialog stays open so you can use Copy invite link if the email does not arrive.
- Pending invitations show under Pending.
What you can offer depends on your own role:
| You are | Roles in the dialog |
|---|---|
| Owner or admin | Admin, Staff, Crew |
| Staff | Crew only |
Staff can invite crew and nothing else on this page. They do not see the remove or revoke buttons.
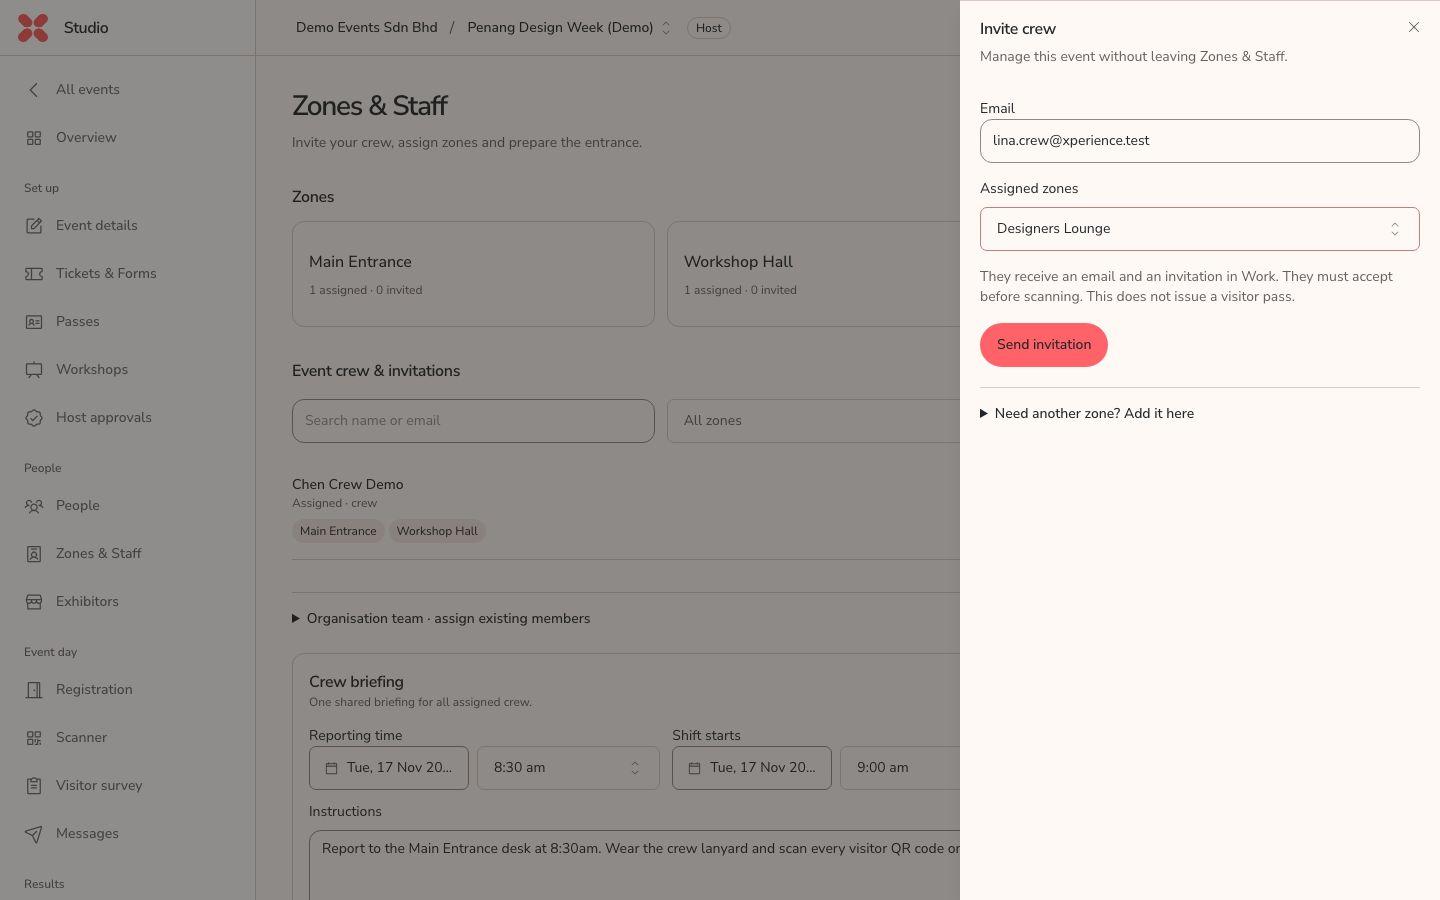
To invite crew to work at specific places, open the event, then Zones & Staff. Choose Add zone to create a zone such as "Main entrance". Choose Invite crew, enter Email, choose Assigned zones and choose Send invitation. Crew accept in Work. This does not issue a visitor pass.
To remove someone, an owner or admin chooses the bin icon beside their name on Team. The last owner cannot be removed. An admin cannot remove an owner.
Hand a scanner link to door crew
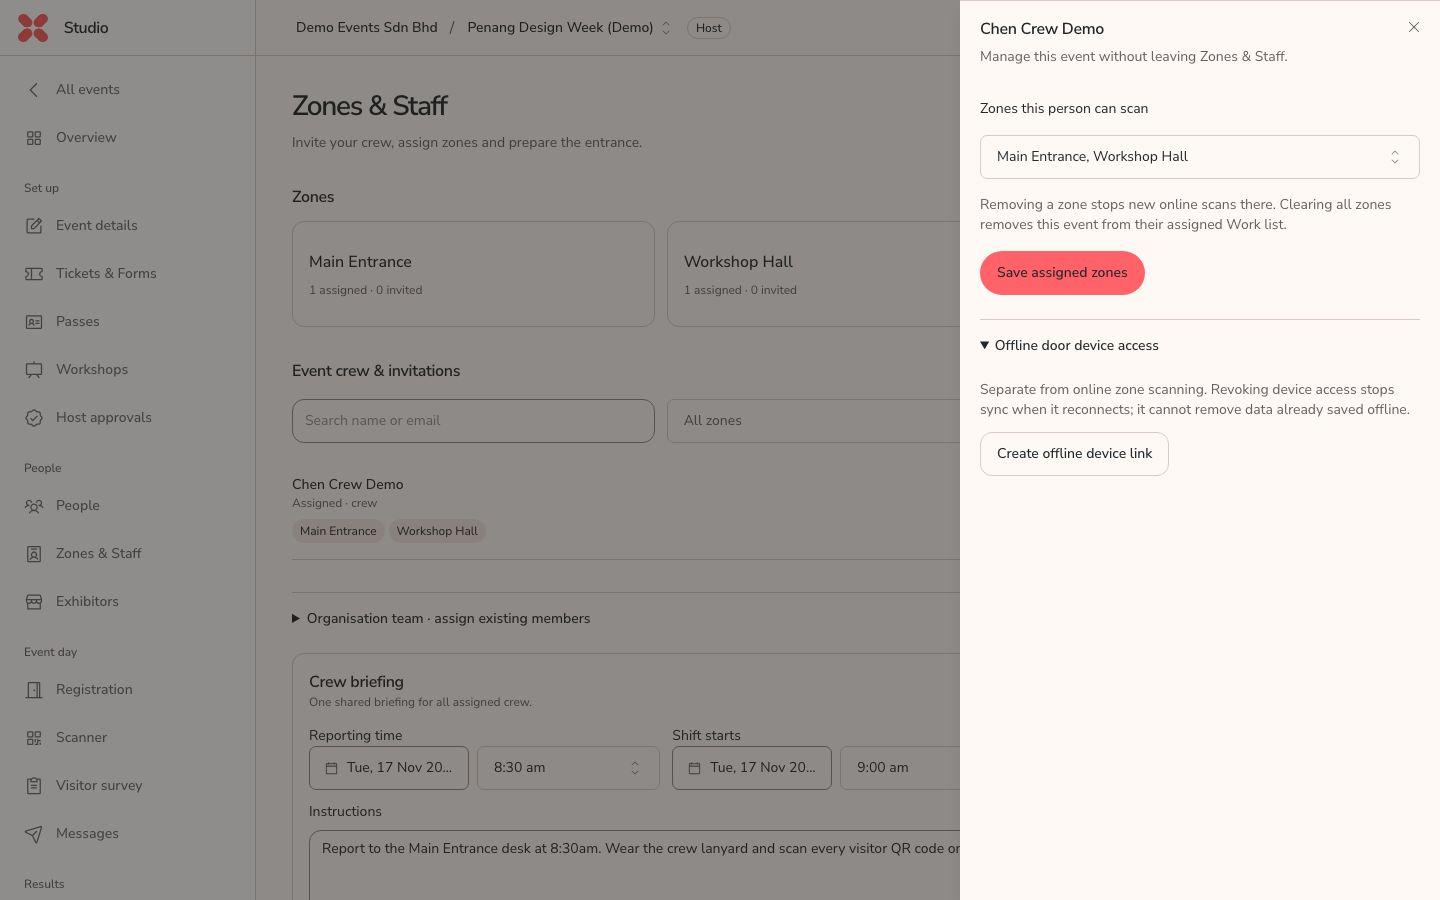
- Open Zones & Staff and choose a crew member.
- Under Zones this person can scan, choose their zones and Save assigned zones.
- For a device that must scan without a signal, open Offline door device access and choose Create offline device link. Send the link to that person, or choose Copy device link.
- Revoke offline device access stops that device syncing when it reconnects. It cannot remove data already saved on the phone.
Owners, admins and staff can do this.
Create discount codes
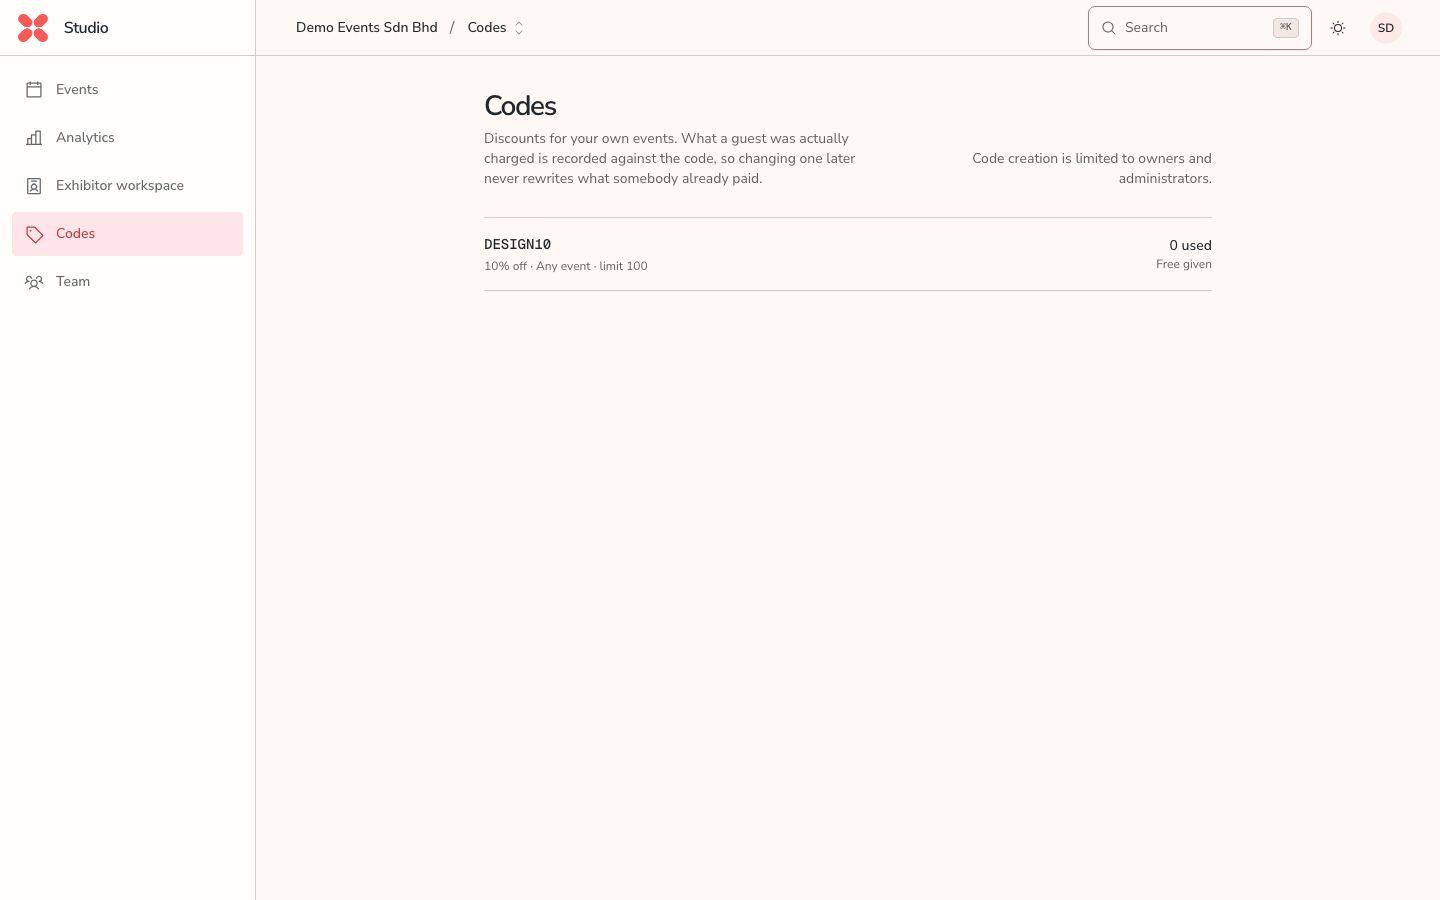
Only owners and admins can create codes.
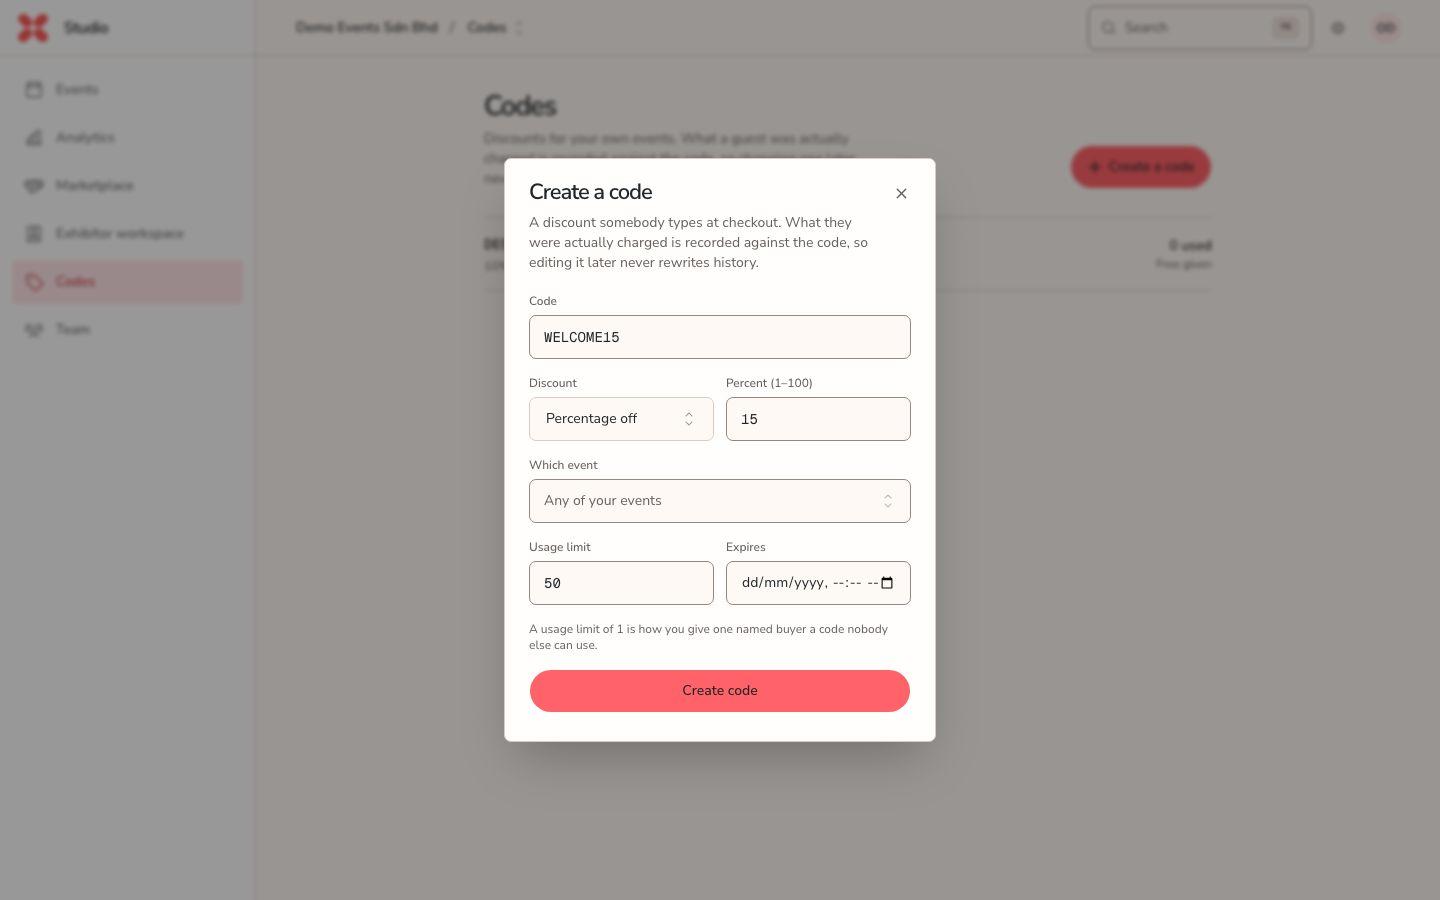
- In Studio, open Codes.
- Choose Create a code.
- Enter Code, choose Discount (Percentage off or Fixed amount off) and the value.
- Under Which event, pick one event or leave Any of your events.
- Add an optional Usage limit and Expires. A limit of 1 gives one named buyer a code nobody else can use.
- Choose Create code.
Staff see the message "Code creation is limited to owners and administrators." and no Create a code button.
Read reports
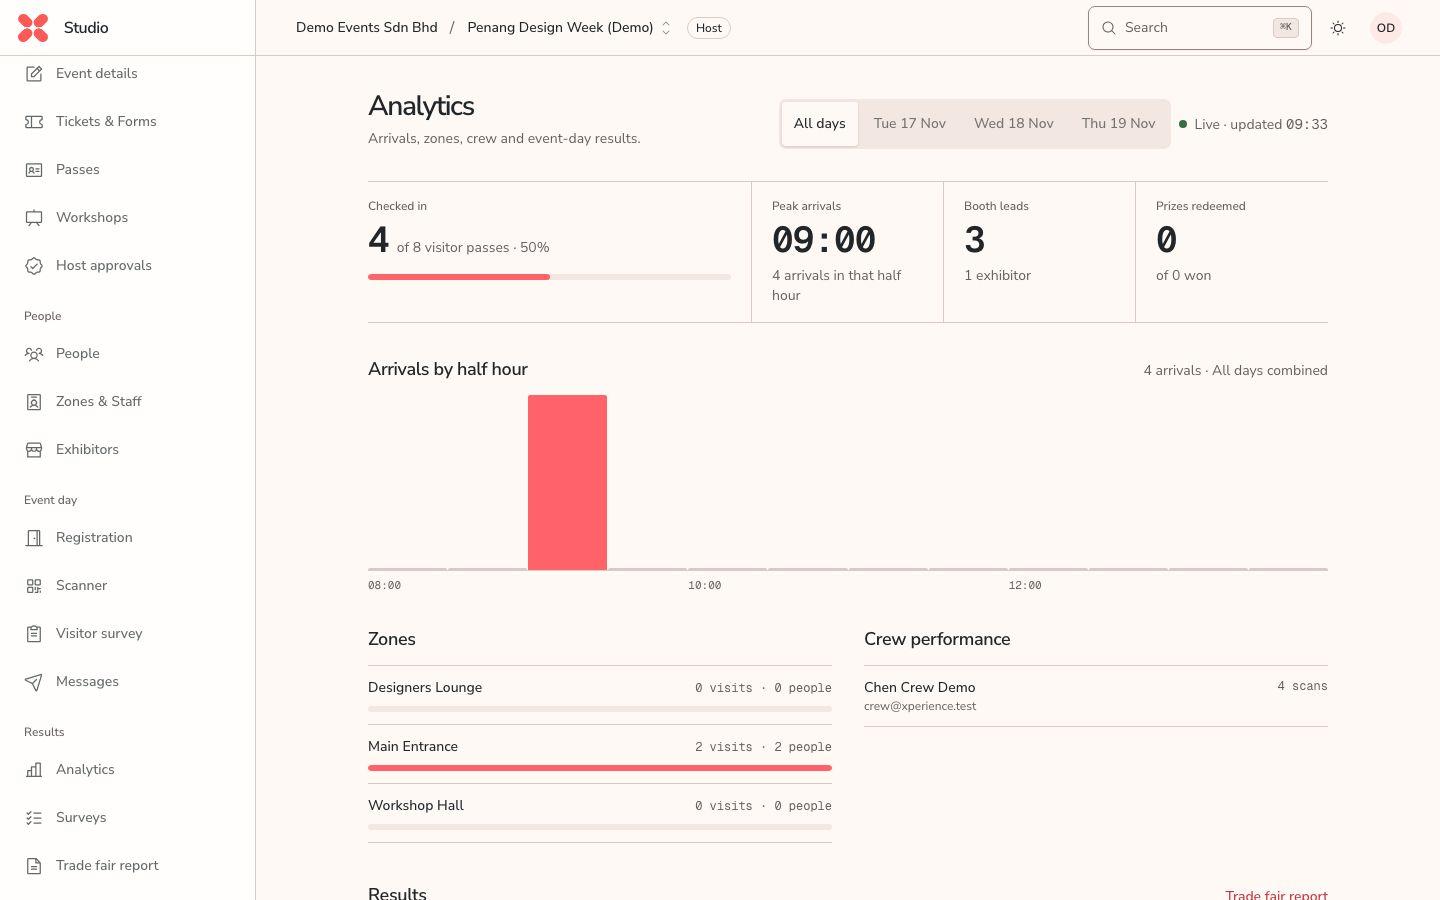
- Open the event, then Analytics for admission, zones and crew performance. Studio also has an all-events Analytics page in the main navigation.
- Open Surveys to see exhibitor, conference and visitor survey results. See MATRADE surveys.
- Open Trade fair report for the figures an auditor certifies. See MATRADE reporting.
- Open People to see everyone connected to the event.
Who can do what
This table comes from the role checks in the Xperience API and the Studio screens. The API checks the role on every request, so a hidden button is not the only protection.
| Action | Owner | Admin | Staff | Crew |
|---|---|---|---|---|
| Open Studio | Yes | Yes | Yes | No |
| Create, rename, duplicate and edit events | Yes | Yes | Yes | No |
| Add, edit and remove ticket types and workshops | Yes | Yes | Yes | No |
| Publish or unpublish an event | Yes | Yes | No | No |
| Delete an event | Yes | Yes | No | No |
| Invite crew | Yes | Yes | Yes | No |
| Invite admin or staff | Yes | Yes | No | No |
| Revoke a pending invitation | Yes | Yes | No | No |
| Remove a team member | Yes | Yes, except an owner | No | No |
| Create or retire a discount code | Yes | Yes | No | No |
| Give or revoke a scanner link | Yes | Yes | Yes | No |
| Invite exhibitor companies, manage zones and surveys | Yes | Yes | Yes | No |
| Send a message to ticket holders | Yes | Yes | Yes | No |
| Open Marketplace in the Studio navigation | Yes | Yes | No | No |
| Approve host approvals | Yes | Yes | No | No |
| Scan visitors at an assigned zone | Not by role alone | Not by role alone | Not by role alone | Yes |
Notes:
- Scanning is its own authority. A person scans through an accepted crew assignment to a zone, or through an offline device link. Crew hold that and nothing in Studio. Owners, admins and staff can also be given zones.
- The last owner of a workspace cannot be removed.
- Platform administrators are separate from all of these roles. See the platform administrator guide.
- A company that sells at your event is not an organiser. Its owner and crew use Exhibitor work.